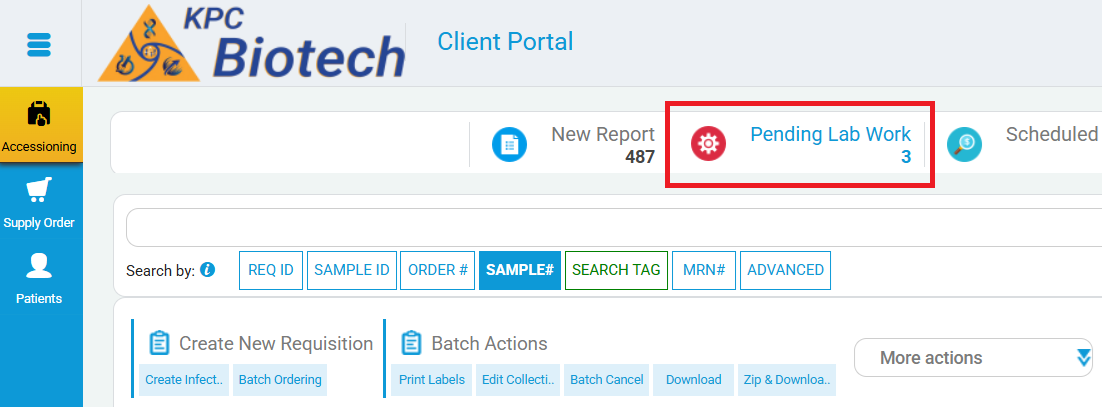
The default page you will see after logging in will be the PENDING LAB WORK page. Start here to create a PATIENT ORDER
3
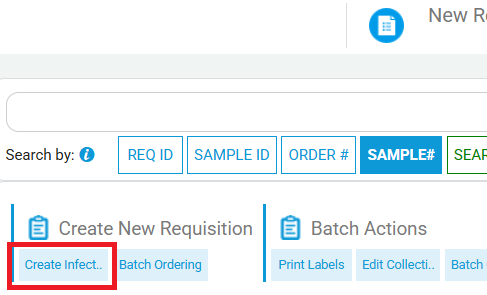
Create an Order
Create Infectious Disease Requisition
Locate the Create New Requisition section and click CREATE INFECTIOUS DISEASE REQ.
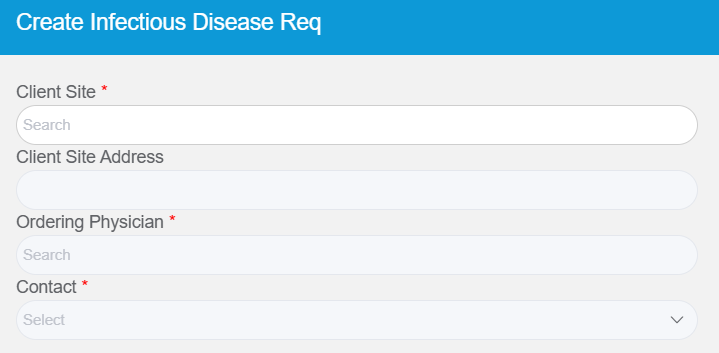
Site Information
Choose the CLIENT SITE (if multiple sites are available)
Choose the ORDERING PHYSISICIAN
Select the CONTACT (if multiple contacts are available)
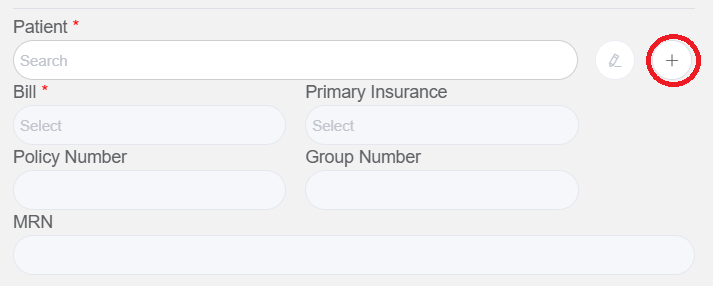
New or Existing Patient
Existing Patient
If an EXISTING PATIENT, select the patient from the dropdown. (If update is needed, click the pencil icon next to the patient name field)
Skip next 3 steps
New Patient
If this is a NEW PATIENT, click the + button and follow next 3 steps.
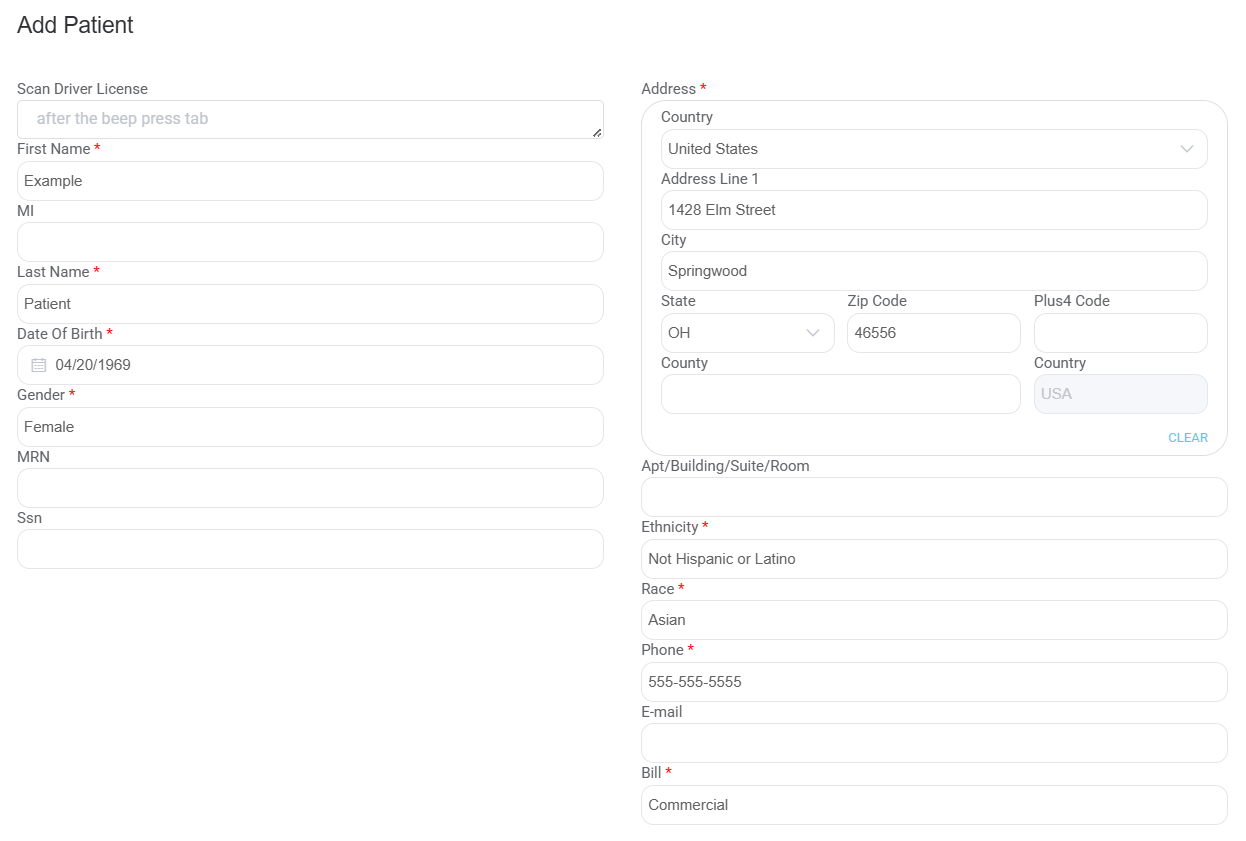
New Patient Information
Fill out all required fields marked with a red asterisk *
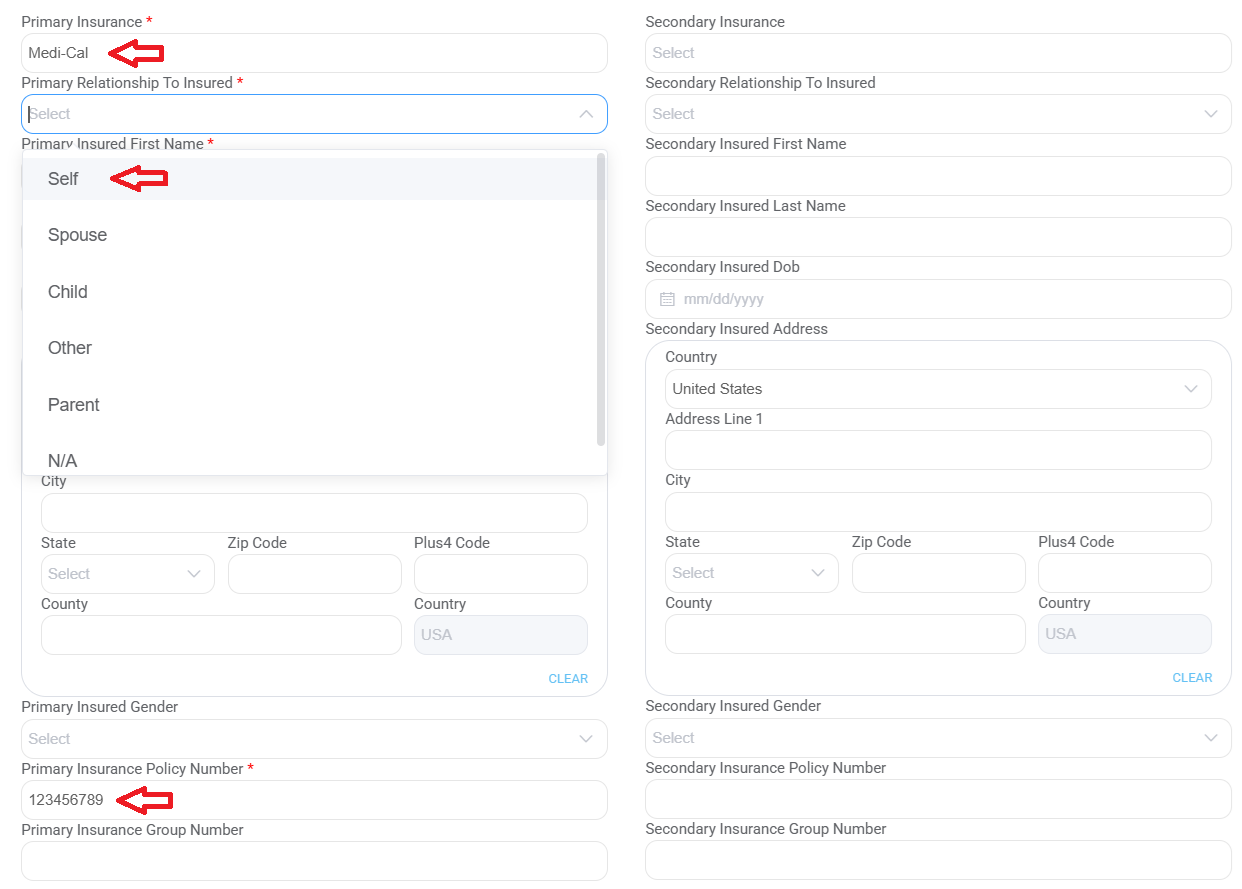
Self Insured Patient
Select the PRIMARY INSURANCE from the dropdown.
If the patient is self insured, select Self in the PRIMARY RELATIONSHIP TO INSURED dropdown.
Patient information will automatically populate.
Enter PRIMARY INSURANCE POLICY NUMBER as matching the insurance card.
(If the patient has a secondary insurance, follow the same steps under Secondary Insurance)
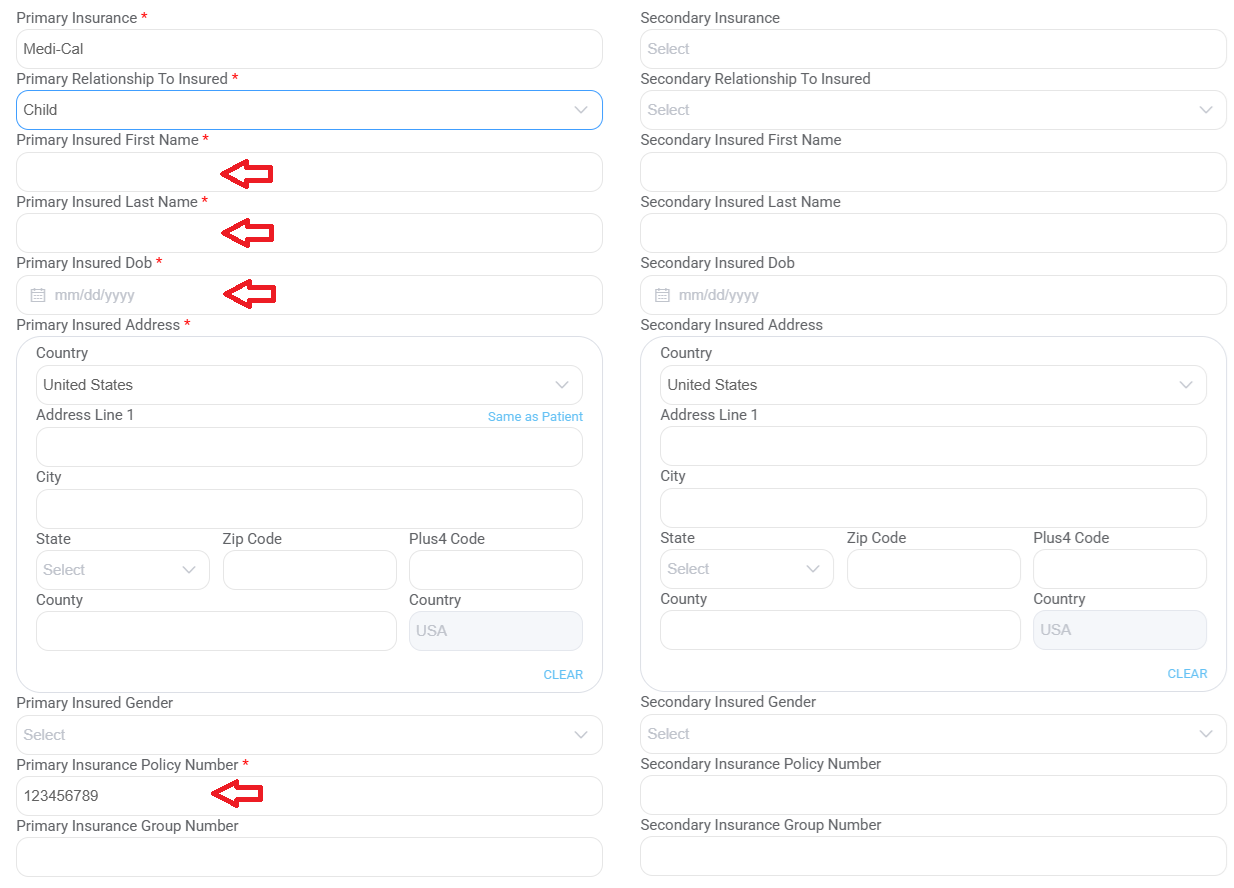
If the patient is a dependent, skip this step
Dependent Insured Patient
Select the PRIMARY INSURANCE from the dropdown.
If the patient is a dependent, select the relationship of the patient to the insured person in the PRIMARY RELATIONSHIP TO INSURED dropdown.
The highlighted patient information will need to be manually input.
Enter PRIMARY INSURANCE POLICY NUMBER as matching the insurance card.
(If the patient has a secondary insurance, follow the same steps under Secondary Insurance)
A photo ID of the primary insured person must be uploaded as described in a later step if the patient is a dependent
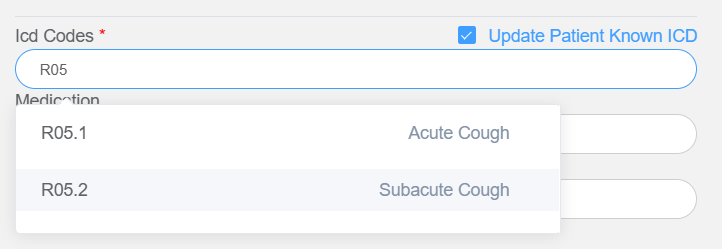
ICD Code
Select at least one ICD-10 CODE from the ICD Code dropdown.
Recommended ICD-10 codes can be found on our Syndromic Menu
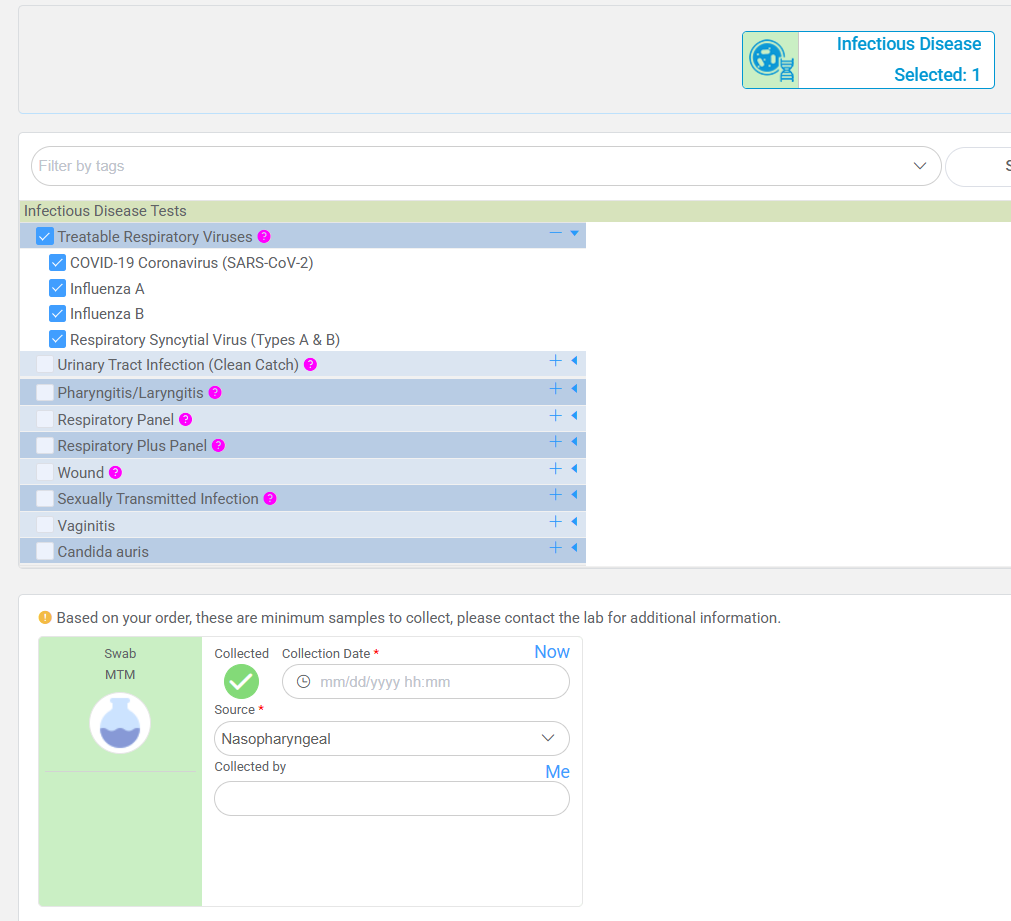
Test/Panel Selection
Select the PANEL from the right side of the webpage.
If only specific tests are being selected, click on the + to access the dropdown of tests.
Once a test or panel is selected, the Collection Information box will appear. Please enter the COLLECTION DATE and select the SPECIMEN SOURCE from the dropdown if applicable.
Collection instructions can be found by clicking on the pink ?
Only one panel may be selected per order. If more than one panel is needed, a second specimen must be collected and a second order must be made.
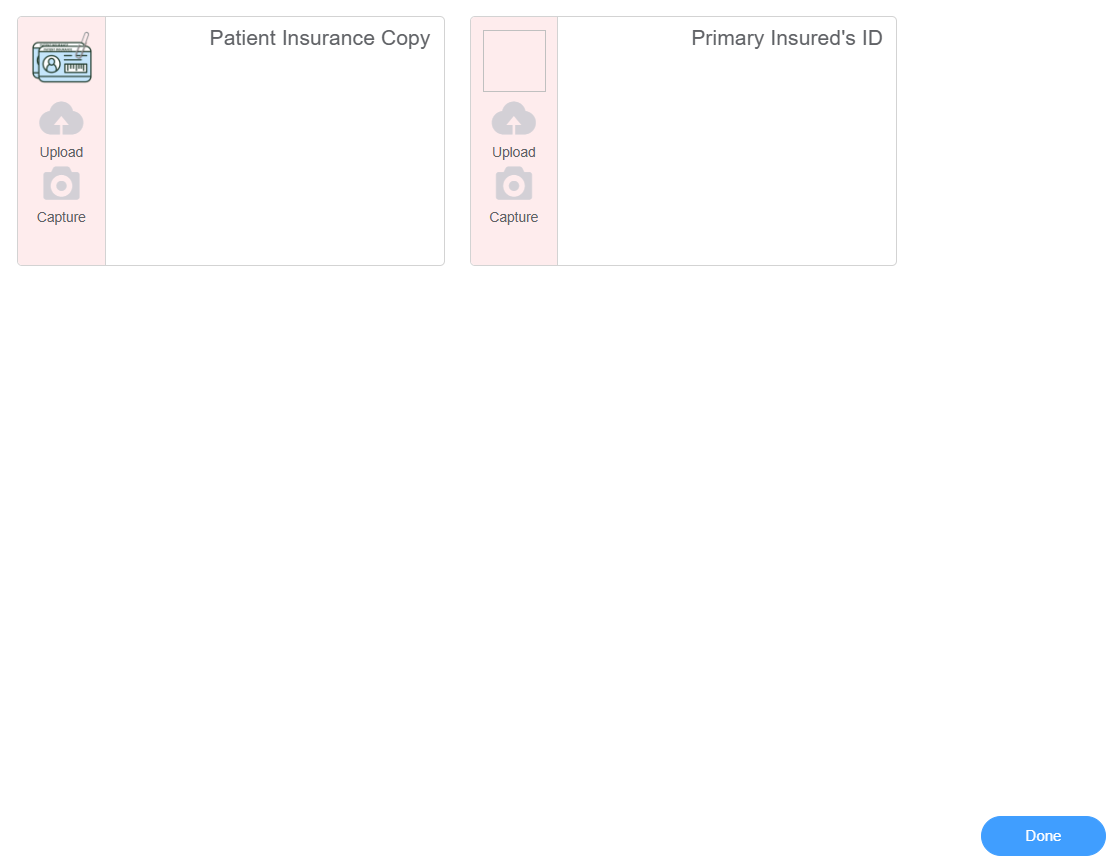
Document Upload
On the bottom right of the browser, you will find 4 buttons. Click on the DOCUMENTS button.
A copy of the patient’s insurance card must be uploaded along with the order.
If the patient is a dependent, a photo ID of the insured must be uploaded here as well.
Once the required documents are uploaded, click the DONE button on the bottom right.
After the document upload, click SAVE and a new window will open with a generated Requisition Form
Order Creation Complete
Thank you
Please proceed to Step 4
4
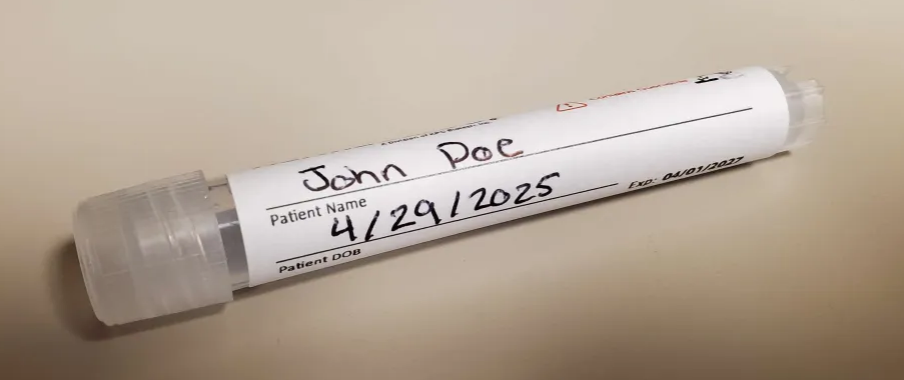
Label Specimen
Make sure to label the specimen container with PATIENT NAME and DATE OF BIRTH
*Note: Name and Date of Birth on specimen must match the Name and Date of Birth on the Requisition
5
Laboratory
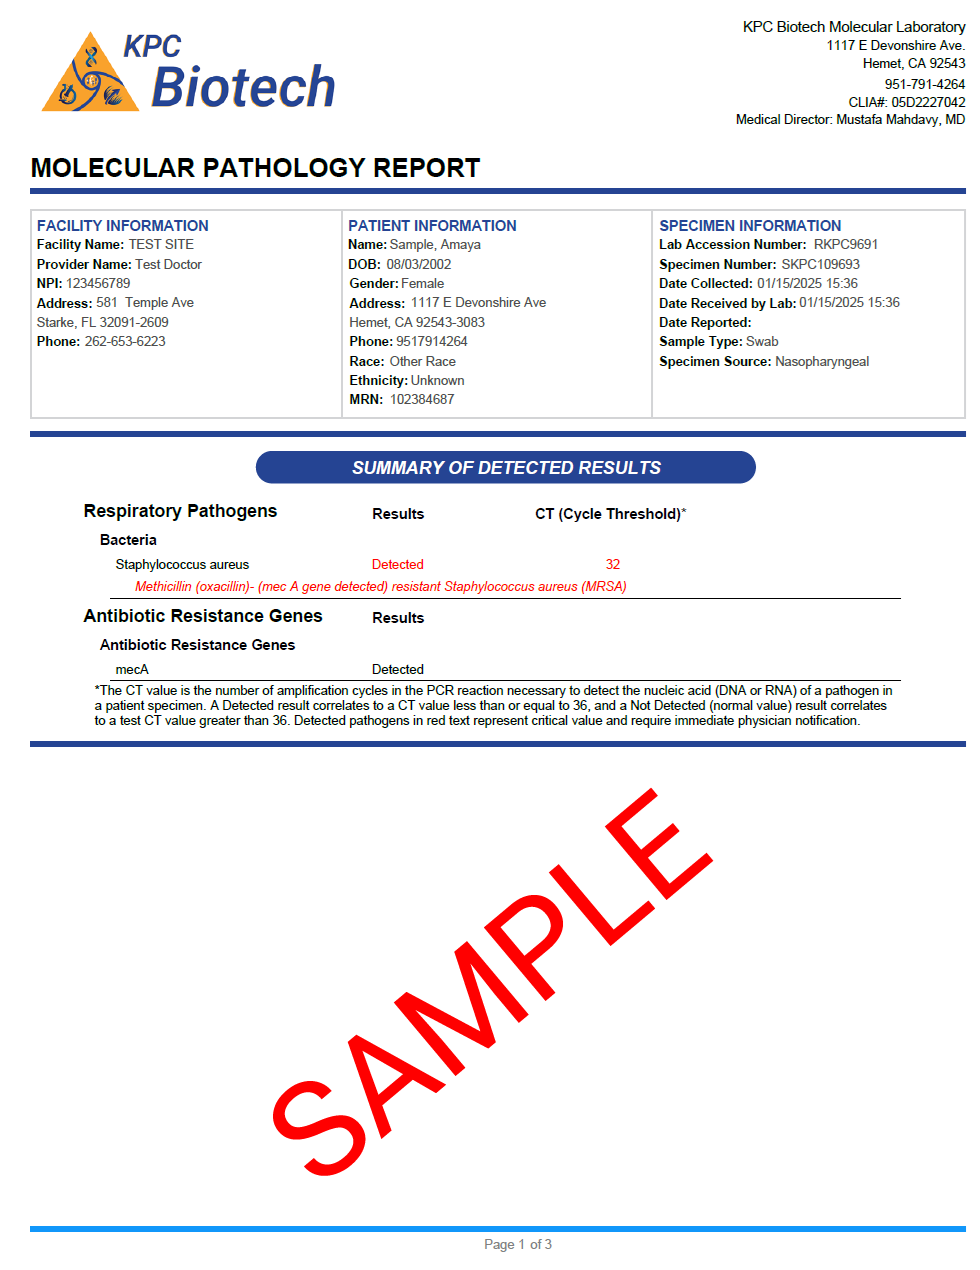
The laboratory will process the test and upload the result. Once the result is uploaded, it will be available on the NEW REPORT page.
*If enabled, a report will also automatically be faxed to the fax number on file
Sample Page 1/3
Sample Page 2/3
Sample Page 3/3
6
Final Report
Go to the NEW REPORT page to view results for the first time. Locate the order and click the printer icon on the left side of the order. If the report has been view, it will be removed from the NEW RESULTS page. This is implemented to only retain results that are not yet viewed by the contact/provider. You can find the viewed report by going the ALL tab
7
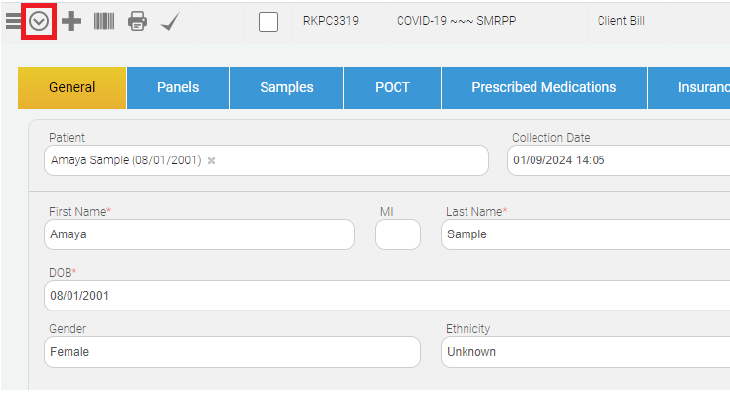
Update an Existing Patient
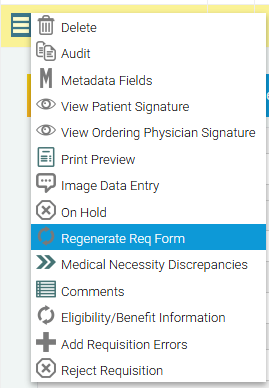
On the ACCESSIONING PAGE, locate the order to be updated/corrected. Once the order is located, click on the DOWN ARROW button to bring up the patient details. Once the needed information has been updated, click the SAVE AND UPATE PATIENT button. After saving, click the burger menu button and select REGENERATE REQ FORM from the the list.
8
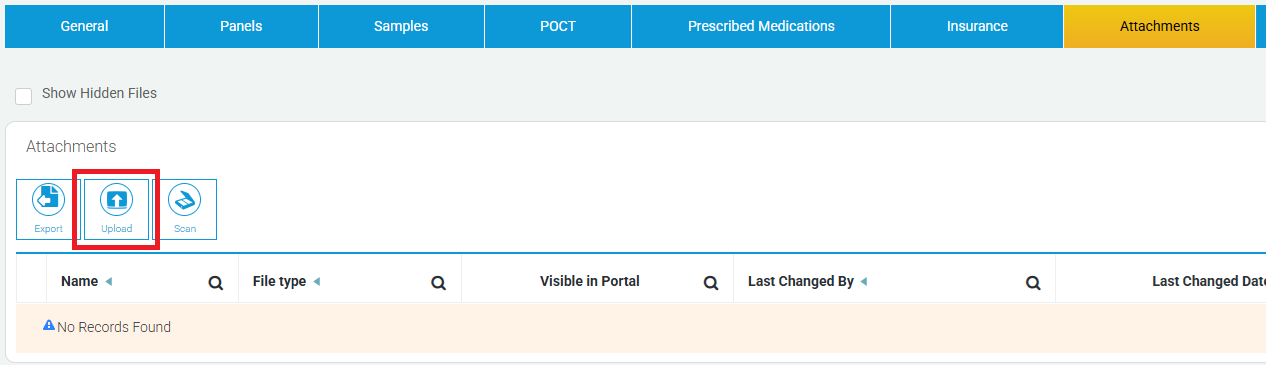
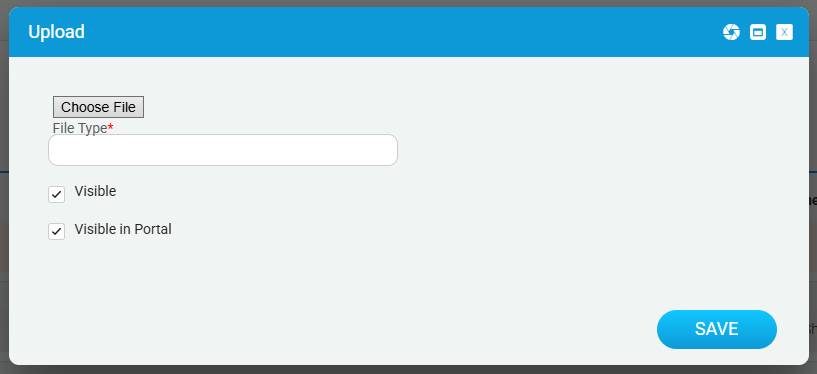
Upload Insurance to Existing Order
On the ACCESSIONING PAGE, locate the order to be updated/corrected. Once the order is located, click on the DOWN ARROW button to bring up the patient details. From here, navigate to the ATTACHMENTS tab and then click on the UPLOAD button. Click on the CHOOSE FILE button to select the file for upload and save.